Posts

Showing posts from May, 2014

Letter basket: Productive procrastination

Image
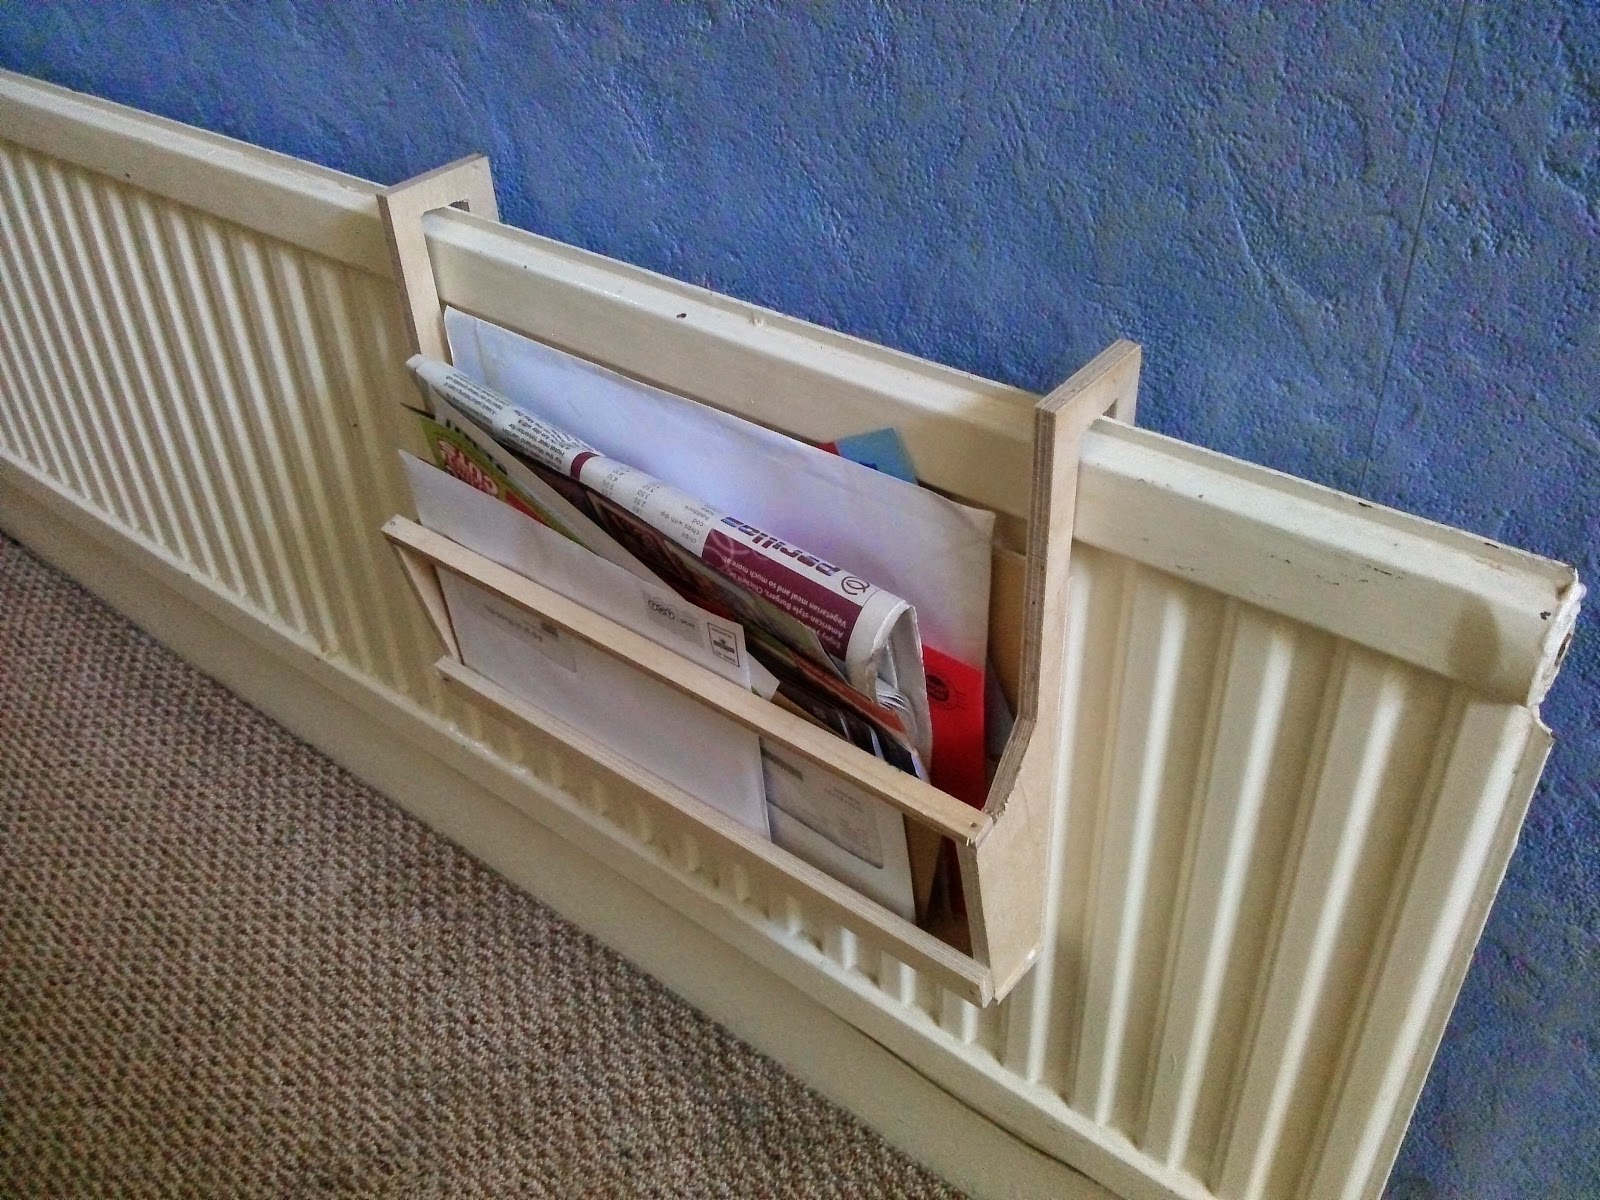
I needed a break from working on Acorn, but I felt that if I halt my productivity then It'll be pretty hard to start it back up. Maintaining a consistent working ethos is good. As long as I'm doing something productive, no matter what it is, I find myself being able to switch back to working on important stuff opposed to if I had halted productivity. So last thursday I gave myself a break from working on the final project. Instead I looked for something productive I could do. Walking outside my room to the front passageway I saw load of post on the floor. So I decided to go off into the wood workshop and make a letter basket to hang on the passage radiator. I used my vernier calipers to measure the thickness of the radiator and the gap behind it and set off to the workshop. It took me under an hour from planning to completion, and I'd made a thing. It wasn't very good and was only put together out of old scrap wood they had lying around, but I felt satisfied with my

FYP: Accessibility, and Justification of Equipment

The next step was hooking up the master arduino to Hazel and have it listening out for the webapp's messages. This wasn't that hard as I'd already done it as part of my prior development in December. Unfortunately I was lacking a WiFly shield I had borrowed from the university at the time, and the university had all of the WiFlys booked out.  However part of the intention of this project was accessibility, the components needed to be cost effective and easily accessible. This cannot be said for the WiFly shield as it costs around $70 . The official Arduino WiFi shield costs around the same . Instead I actively opted to use an ethernet shield for a number of reasons: Price. A new third-party ethernet shield can cost less than £10 on ebay. The one I bought for this project cost £12.49 . I selected that one because it had UK distribution. Standardization. Nearly any third-party ethernet shield can be used with the Arduino's default Ethernet library. Ano

FYP: Sorting out the Webapp, MQTT

Image
Well this blogging thing hasn't been anywhere near as regular as I hoped it would be. Anyway at this point solid radio communication had been established and it was time to connect it up to the webapp. I decided to use MQTT as a communication protocol between the webapp and the Arduino with the transmitter on it, the master. My VPS, Hazel, has an MQTT broker running on it currently. Hooking up the webapp to publish was pretty easy using the mqttws library, a library for sending and receiving MQTT messages over web sockets. I set up the webapp  so that it published the contents of the form with an identifier and the value for the respective form element. At this point I wanted as much logic to be handled by the webapp as possible. I wanted the transmitter to be completely dumb. This meant that if I wanted to change how the data string worked I could do it on the webapp and not have to touch the master Arduino. So the webapp was pretty functional. It sent values through an

FYP: Arduino data transfer over 433MHz RF

So Tuesday went... interestingly. Getting the transmitter transmitting data other than the binary ones and zeros went kinda well. It wasn't quite as hard as I expected, but still took a little while to get sorted. The goal was to set up the transmitter sending a numerical ID and a value between 0 and 170. The 0-170 value was so that the receiver could forward this onto the servo, which would then the volume knob. This was generated by a potentiometer reading being mapped from 0-1023 to 0-170. Then this number was converted into a string, and prefixed with a number of '0's to ensure the string length was 3 characters. So essentially '139' would remain unchanged, '72' would be prefixed with a '0' to make the string '072', and '8' would be prefixed with two '0's to make '008'. This three character string would be then prefixed by the one character ID. Broadcasting something like 1139, 1072 or 1008. Getting this transm

FYP: Shonky Wifi & Radio Frequency

Image
So the initial goal today was to essentially hook up the already completed Arduino & MQTT volume control setup to the Acorn webapp. So instead of manually inputting a number into an MQTT client, I was intending on adding a volume slider on Acorn. This would mean that I could simply slide the slider to allow control over the servo, and thus volume. The completed portion (made around December 2013) can be seen here: However that didn't end up happening. The hurdle was that the WiFi shield I'd hastily grabbed from the university appeared to be a dud. I could have still gotten on with the webapp side, but I figured that I'd rather spend another day doing that when I could test it properly with the servo stuff. Instead I decided to get on with the communication stuff. I needed a way for all the Arduinos to talk to each other. A while ago I purchased some 433MHz radio frequency transmitters and receivers . I chose the 433 ones because of their low cost and my remote con