Posts

Modding a killswitch into a wired Xbox 360 controller.

Image
I haven't posted anything here in a while, and have amassed a rather large number of undocumented projects over the last year and a bit. To kick myself back into gear I figured I'd document this 360 controller mod I did recently. As a little background: I game on PC and own both a wired 360 controller and a flight stick. Having both my 360 controller and flight stick plugged into the PC at the same time causes deadzone drift on flight sims and Elite. This basically means that my aircraft will never fly straight, unless I unplug the 360 controller. Now that's fine, but location of my usb port requires me to lean over slightly to unplug it. I'd rather not have to constantly lean over unplug, and plug the controller back in whenever I want to play a game with my flight stick. So a solution for this was to wire a switch into my controller so I could simply cut the USB data wires to essentially emulate an unplug. The controller is pretty well engineered, so finding a...

Turning a laptop screen into an external monitor.

Image
So my old Dell L502x died. However most of the components were fine, it's just the motherboard that seemed to be down with a case of water damage. So along with turning the chassis of the laptop into a dock/stand for my new laptop I wanted to turn the laptop's screen into an external monitor. So the first thing I did was extract the panel from the housing to take a look at the model number and the interface. If you're looking to do this yourself just look up the documentation for your laptop or go to ifixit.com  and look it up. Fortunately Dell has excellent documentation and a pretty straightforward teardown process.

Logitech G502 Proteus Core Teardown & Scroll Wheel Replacement

Image
So I recently acquired a Logitech  G502  mouse, and I have to say I absolutely love it. It's a beautiful mouse, and a worth upgrade to my old G500s mouse. However my one gripe was the new all-metal scroll wheel. While the weight was nice, I missed the rubber ring around my old 500s. This led me to attempt to replace the new 502 scroll wheel with the old one from my busted 500s. So let's get started shall we? So as you can see, these are what the mice look like side-by side. While they look drastically different, the ergonomics are actually very similar among the two. The first step was to take the mouse feet off and unscrew the screws that hold the chassis in place.  Lever the feet off gently with a flathead screwdriver. And they just peel right off. There's four screws on the underside of the mouse.  So the feet are layered. There's double-sided adhesive foam, with the feet on top. On the back foot, I managed to peel off...

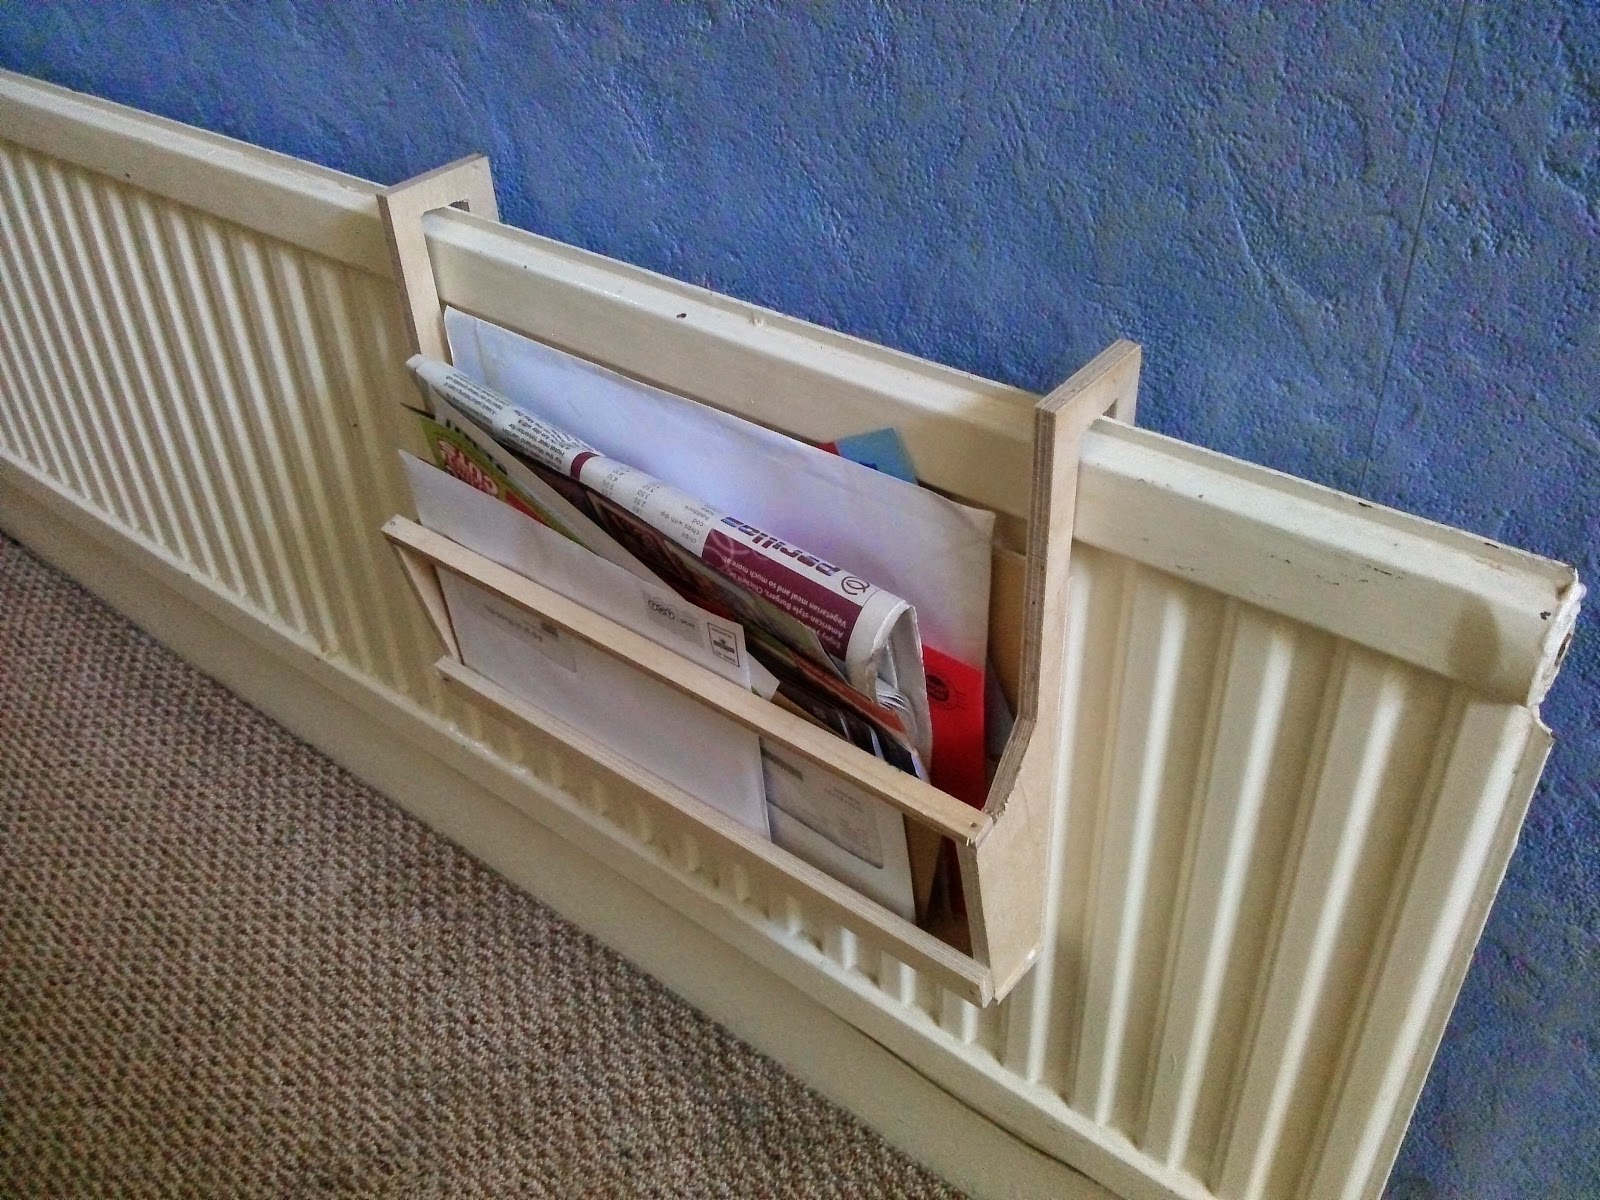
Letter basket: Productive procrastination

Image
I needed a break from working on Acorn, but I felt that if I halt my productivity then It'll be pretty hard to start it back up. Maintaining a consistent working ethos is good. As long as I'm doing something productive, no matter what it is, I find myself being able to switch back to working on important stuff opposed to if I had halted productivity. So last thursday I gave myself a break from working on the final project. Instead I looked for something productive I could do. Walking outside my room to the front passageway I saw load of post on the floor. So I decided to go off into the wood workshop and make a letter basket to hang on the passage radiator. I used my vernier calipers to measure the thickness of the radiator and the gap behind it and set off to the workshop. It took me under an hour from planning to completion, and I'd made a thing. It wasn't very good and was only put together out of old scrap wood they had lying around, but I felt satisfied with my...

FYP: Accessibility, and Justification of Equipment

The next step was hooking up the master arduino to Hazel and have it listening out for the webapp's messages. This wasn't that hard as I'd already done it as part of my prior development in December. Unfortunately I was lacking a WiFly shield I had borrowed from the university at the time, and the university had all of the WiFlys booked out.  However part of the intention of this project was accessibility, the components needed to be cost effective and easily accessible. This cannot be said for the WiFly shield as it costs around $70 . The official Arduino WiFi shield costs around the same . Instead I actively opted to use an ethernet shield for a number of reasons: Price. A new third-party ethernet shield can cost less than £10 on ebay. The one I bought for this project cost £12.49 . I selected that one because it had UK distribution. Standardization. Nearly any third-party ethernet shield can be used with the Arduino's default Ethernet library. Ano...

FYP: Sorting out the Webapp, MQTT

Image
Well this blogging thing hasn't been anywhere near as regular as I hoped it would be. Anyway at this point solid radio communication had been established and it was time to connect it up to the webapp. I decided to use MQTT as a communication protocol between the webapp and the Arduino with the transmitter on it, the master. My VPS, Hazel, has an MQTT broker running on it currently. Hooking up the webapp to publish was pretty easy using the mqttws library, a library for sending and receiving MQTT messages over web sockets. I set up the webapp  so that it published the contents of the form with an identifier and the value for the respective form element. At this point I wanted as much logic to be handled by the webapp as possible. I wanted the transmitter to be completely dumb. This meant that if I wanted to change how the data string worked I could do it on the webapp and not have to touch the master Arduino. So the webapp was pretty functional. It sent values through an ...

FYP: Arduino data transfer over 433MHz RF

Image
So Tuesday went... interestingly. Getting the transmitter transmitting data other than the binary ones and zeros went kinda well. It wasn't quite as hard as I expected, but still took a little while to get sorted. The goal was to set up the transmitter sending a numerical ID and a value between 0 and 170. The 0-170 value was so that the receiver could forward this onto the servo, which would then the volume knob. This was generated by a potentiometer reading being mapped from 0-1023 to 0-170. Then this number was converted into a string, and prefixed with a number of '0's to ensure the string length was 3 characters. So essentially '139' would remain unchanged, '72' would be prefixed with a '0' to make the string '072', and '8' would be prefixed with two '0's to make '008'. This three character string would be then prefixed by the one character ID. Broadcasting something like 1139, 1072 or 1008. Getting this transm...